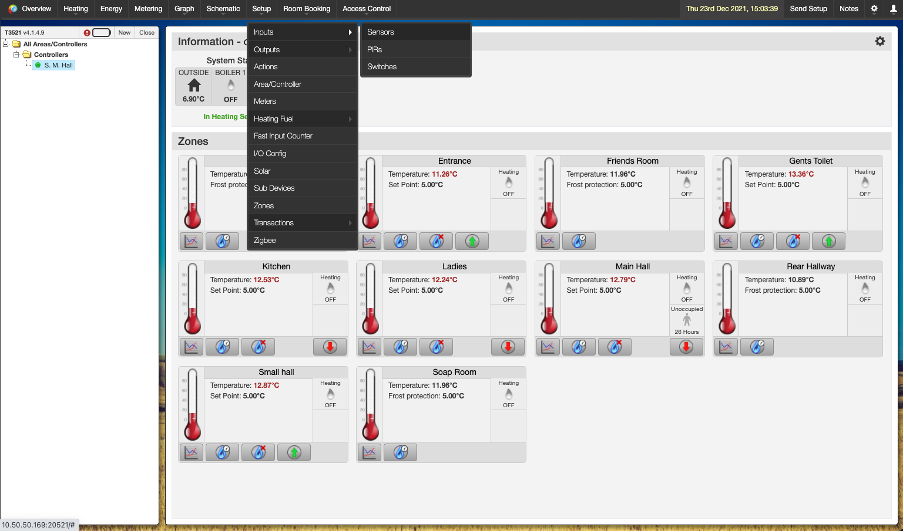
Control Panel Overview
Once you have logged into your HeatingSave system the software will load. To the left of the screen will be the tree menu, this will display all your HeatingSave controllers (Product number T3520). If you want to select a different controller just select it in the menu and the page will reload. If you have multiple controllers, you can select multiple if you hold down the shift key.
Along the top of the screen is the main navigation bar, to access other areas of the software you just hover over menu item, and it will expand showing the sub menu items.
System Overview
The HeatingSave overview gives you detailed information about the current status of the heating system. The overview can be found to the left hand of the top navigation bar.
Boiler Information
At the top of the page, you will see information regarding the boilers within your heating system as well as external factors effecting it.
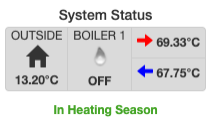
The first tile shows the outside temperature, this is used by the algorithm to calculate the correct time to start heating a zone.
The middle tile shows if the boiler is currently on or off, if the boiler of on the icon will show a blue flame. If you have multiple boilers each boiler will be displayed here in a separate tile.
The end tile shows the current boiler flow temperature (top value) along with the boiler return temperature (bottom value).
Underneath the tiles will display if the HeatingSave system is in winter or summer mode. If the boiler is in winter mode it will display “In Heating Season”.
Zone Status
Under the boiler information is a list of all your heating zones on the controllers you have selected within the tree menu. Each zone has its own tile containing information regarding that zone.
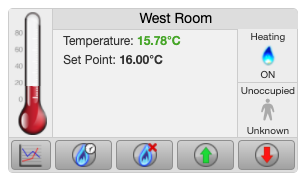
Within the tile you can see the current temperature within the zone along with set point that the zone is maintaining.
To the right of the tile, you can see if the zone is currently heating. If the heating zone also has PIR sensors you can also see if its occupied or not.
Along the bottom of the tile there are several buttons that you can use to alter the status of the zone heating:
- Graph – If you want to see historic information regarding the heating status of this zone click this button. Once clicked the graph will be loaded along with any device associated with this zone.
- Boost – If you want a short burst of heat within this zone click this button. Once clicked the setpoint will be increased for the duration set for this zone. To cancel the boost just click the button again and the heating will resume as normal.
- Ignore – If you want to cancel the heating within this zone just click on the ignore button and the heating will be stopped until the next heating period. To resume the heating just click the button again and the heating will resume as normal.
- Raise – Using the raise button will increase the set point of the zone by 0.5°C until the next heating period.
- Lower – Using the lower button will decrease the set point of the zone by 0.5°C until the next heating period.
Software Shortcuts
Each zone tile has shortcuts to different devices within the zone.
- If you click on the thermomotor any sensors used to control the temperature within that zone will be displayed.
- If you click on the zone title the “Edit Zone” popup will appear where you can edit the heating zone.
- If you click on the occupancy status, any PIR associated with the heating zone will be displayed.